
Make Your Own Worm Compost

Let’s give your trash a little eco-audit! Did you know that over 50% of your garbage is compostable? We’ll give you the down and dirty on compost, and walk you through the steps to create a worm compost at home.
WHAT IS COMPOST?
Compost is a soil conditioner that adds beneficial bacteria, fungi, and nutrients to soil, helps it retain moisture, and suppresses plant disease and pests.
HOW IS COMPOST MADE?
Remember back in elementary school when we learned about decomposers? Well decomposers, which include worms, bacteria, and fungus, eat organic material that might be “leftovers” from another organism and break them down into a simpler form that can be reused in the circle of life. The worms in our compost are vegans so they’ll be eating plant material and breaking it down into a form that can be used for new plant life.
WHY COMPOST?
Unfortunately, organic waste that goes to the landfill generates a greenhouse gas called methane, and methane is 84x worse for global warming than carbon dioxide! Compost on the other hand sequesters carbon, which means it has a large potential to offset carbon. Not to mention that the finished product, often referred to as “black gold,” is GREAT for your plants.
WHY WORM COMPOST?
Also known as vermiculture, worm composting has the smallest footprint. All you need is a storage bin, so it’s great for those who live in apartments or don’t have access to a yard. Plus worm castings are the most nutritious of all compost so you’ll never have to buy chemical fertilizers. Win win!
THINGS TO KNOW BEFORE STARTING
You will specifically need red worms for composting, otherwise known as red wrigglers. If you’re local in LA, we got ours for $18 from Mark the Compost Tea Guy at the Pasadena Farmer’s Market. He hooked us up with European red wrigglers, which supposedly are the hungry hungry hippos of worms. If you’re looking to order worms online, we’ve heard good things about Uncle Jim’s Worm Farm.
As for the location of your worm compost, make sure that you have a dark place between 54 to 84 degrees Farenheit to keep your bin. Outside is fine as long as the temperature requirements are met, it’s protected from rain, and it’s not sitting in direct sunlight.
DIY WORM COMPOST
WHAT YOU’LL NEED:
(2) 10-gallon plastic bins with lids
Drill with 1/4” bit and 1/16” bit
Shredded cardboard or newspaper (we recommend at least 2 issues)
Bucket with water, or a large spray bottle with water
A few handfuls of soil
1 pound of red worms
Small bin with a lid that you can place in the kitchen for scraps (a lid is important so that you don’t attract flies)
Optional: a trowel, tongs, or gloves if you’d rather not touch the worms or food scraps

(2) 10-gallon plastic bins with lids
Drill with 1/4” bit and 1/16” bit

soil
newspaper
spray bottle with water

Red Worms

Small Bin with Lid for Kitchen
DIRECTIONS
Drill at least (20) 1/4” holes on the bottom of both bins. This is for any liquid to drain, which should be minimal.
Drill 1/16” air holes along the top and bottom sides of both bins.
Drill 1/16” air holes in ONE of the lids. Leave the other lid untouched.
Stack everything together. The lid with no holes goes on the bottom, one of the bins goes in the middle, and the lid with air holes goes on top. The second bin can be stored away or stacked under the first bin. We’ll go into what it’s for later on.
Wet your shredded newspaper either by dunking it in a bucket or spraying it with a water bottle. Make sure to wring out any excess water, then fill your bin to a depth of 4”. You can also use cardboard, dried leaves, flowers, or grass clippings.
Mix in a couple handfuls of soil with your bedding to help the worms digest their food. PRO TIP: include some crushed cleaned egg shells in your soil.
Tuck your worm friends gently in a corner and let them get settled.
In a week, you can start feeding your worms. Start with a handful or two of scraps and ALWAYS bury it well, covering with some fresh wet newspaper if necessary so that flies don’t develop. Feed once a week and rotate corners so that you can observe if they’ve finished their food in one corner. You may need to adjust how often or the amount you feed them depending on how quickly they’re eating. You might also notice their preference for certain foods over others (maybe they’ll like blueberries?).
In 3 - 4 months or when you’ve noticed that the worms have gone through most of the bedding, stop feeding them and prep the second bin. Add fresh bedding and food scraps into the second bin, stack the second bin on top of the first bin, and cover with the lid. The worms will slowly move up into the second bin as they go in search for food, leaving behind an easy way to harvest the worm castings! If there is liquid collected in the bottom lid, you can use this to fertilize your plants too.

Drill 1/4” holes on the bottom of both bins
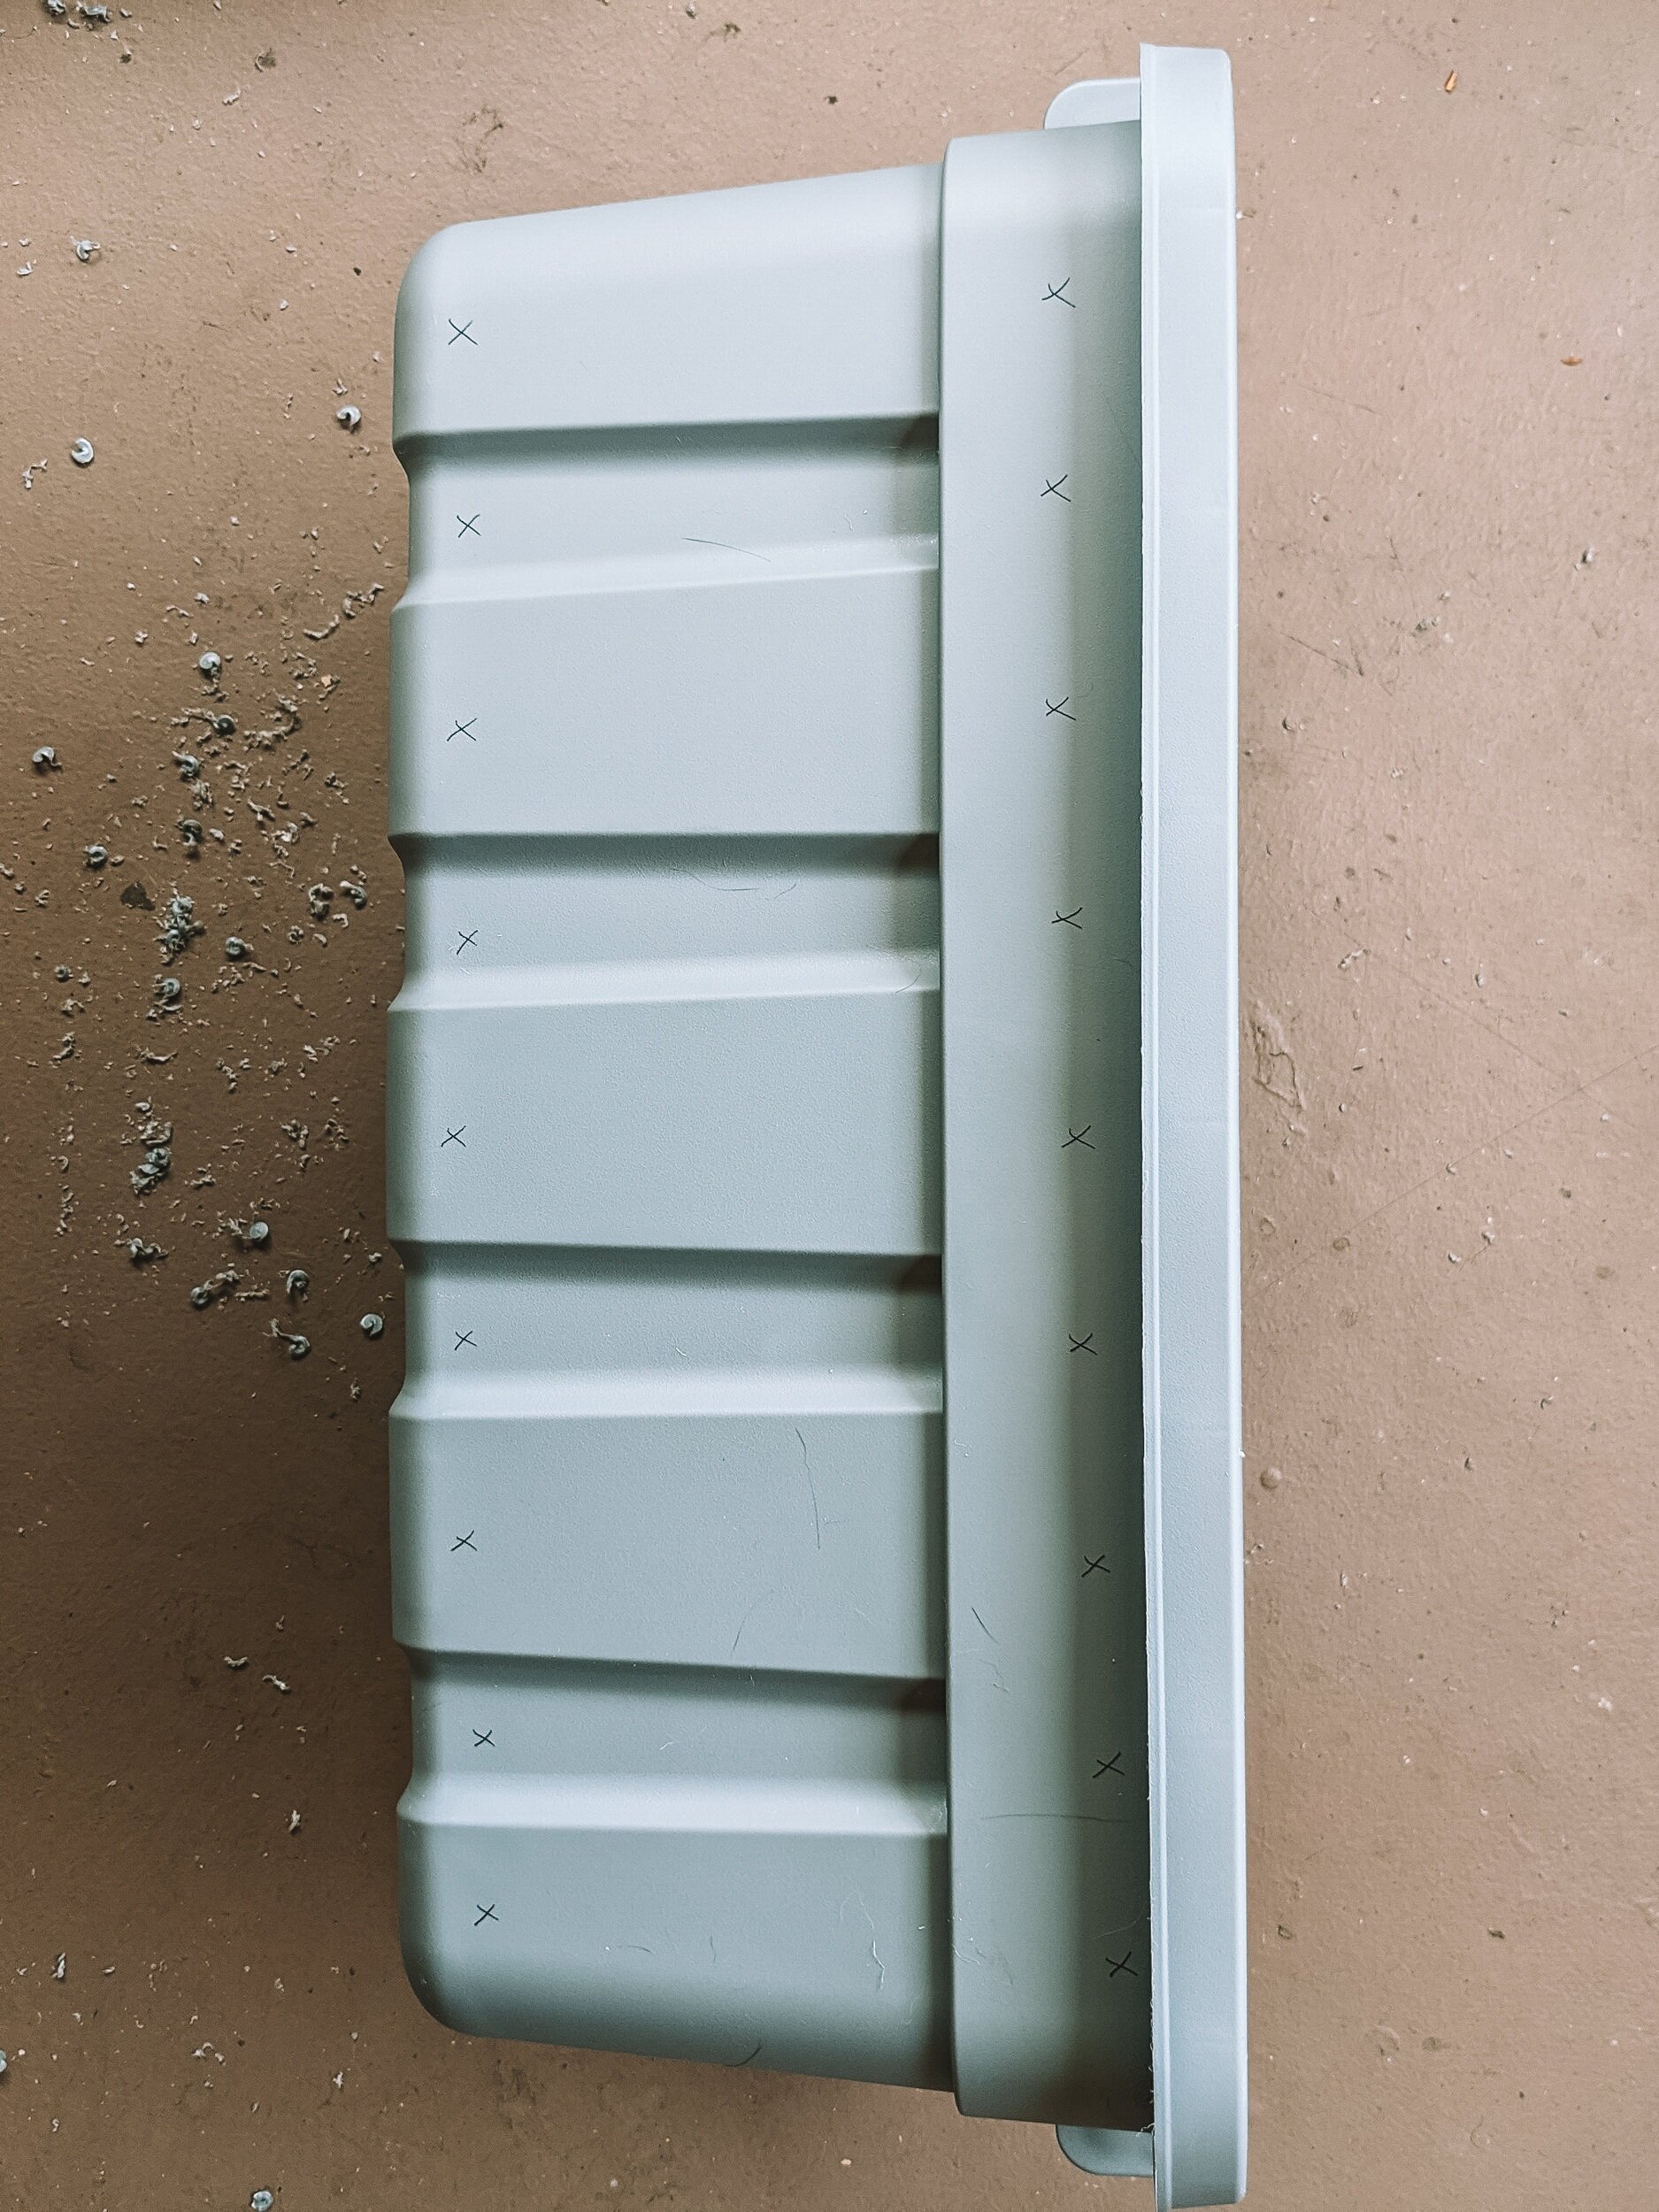
Drill 1/16” holes along the top & bottom Sides of both bins

Drill 1/16” holes in ONE lid

STACK IT:
Bottom - lid with no holes
Middle - bin
Top - Lid with holes

Wet Newspaper & Wring

Fill to 4”

Add a couple handfuls of soil

Add your worms in one corner

After a week, add some scraps. rotate corners each week.
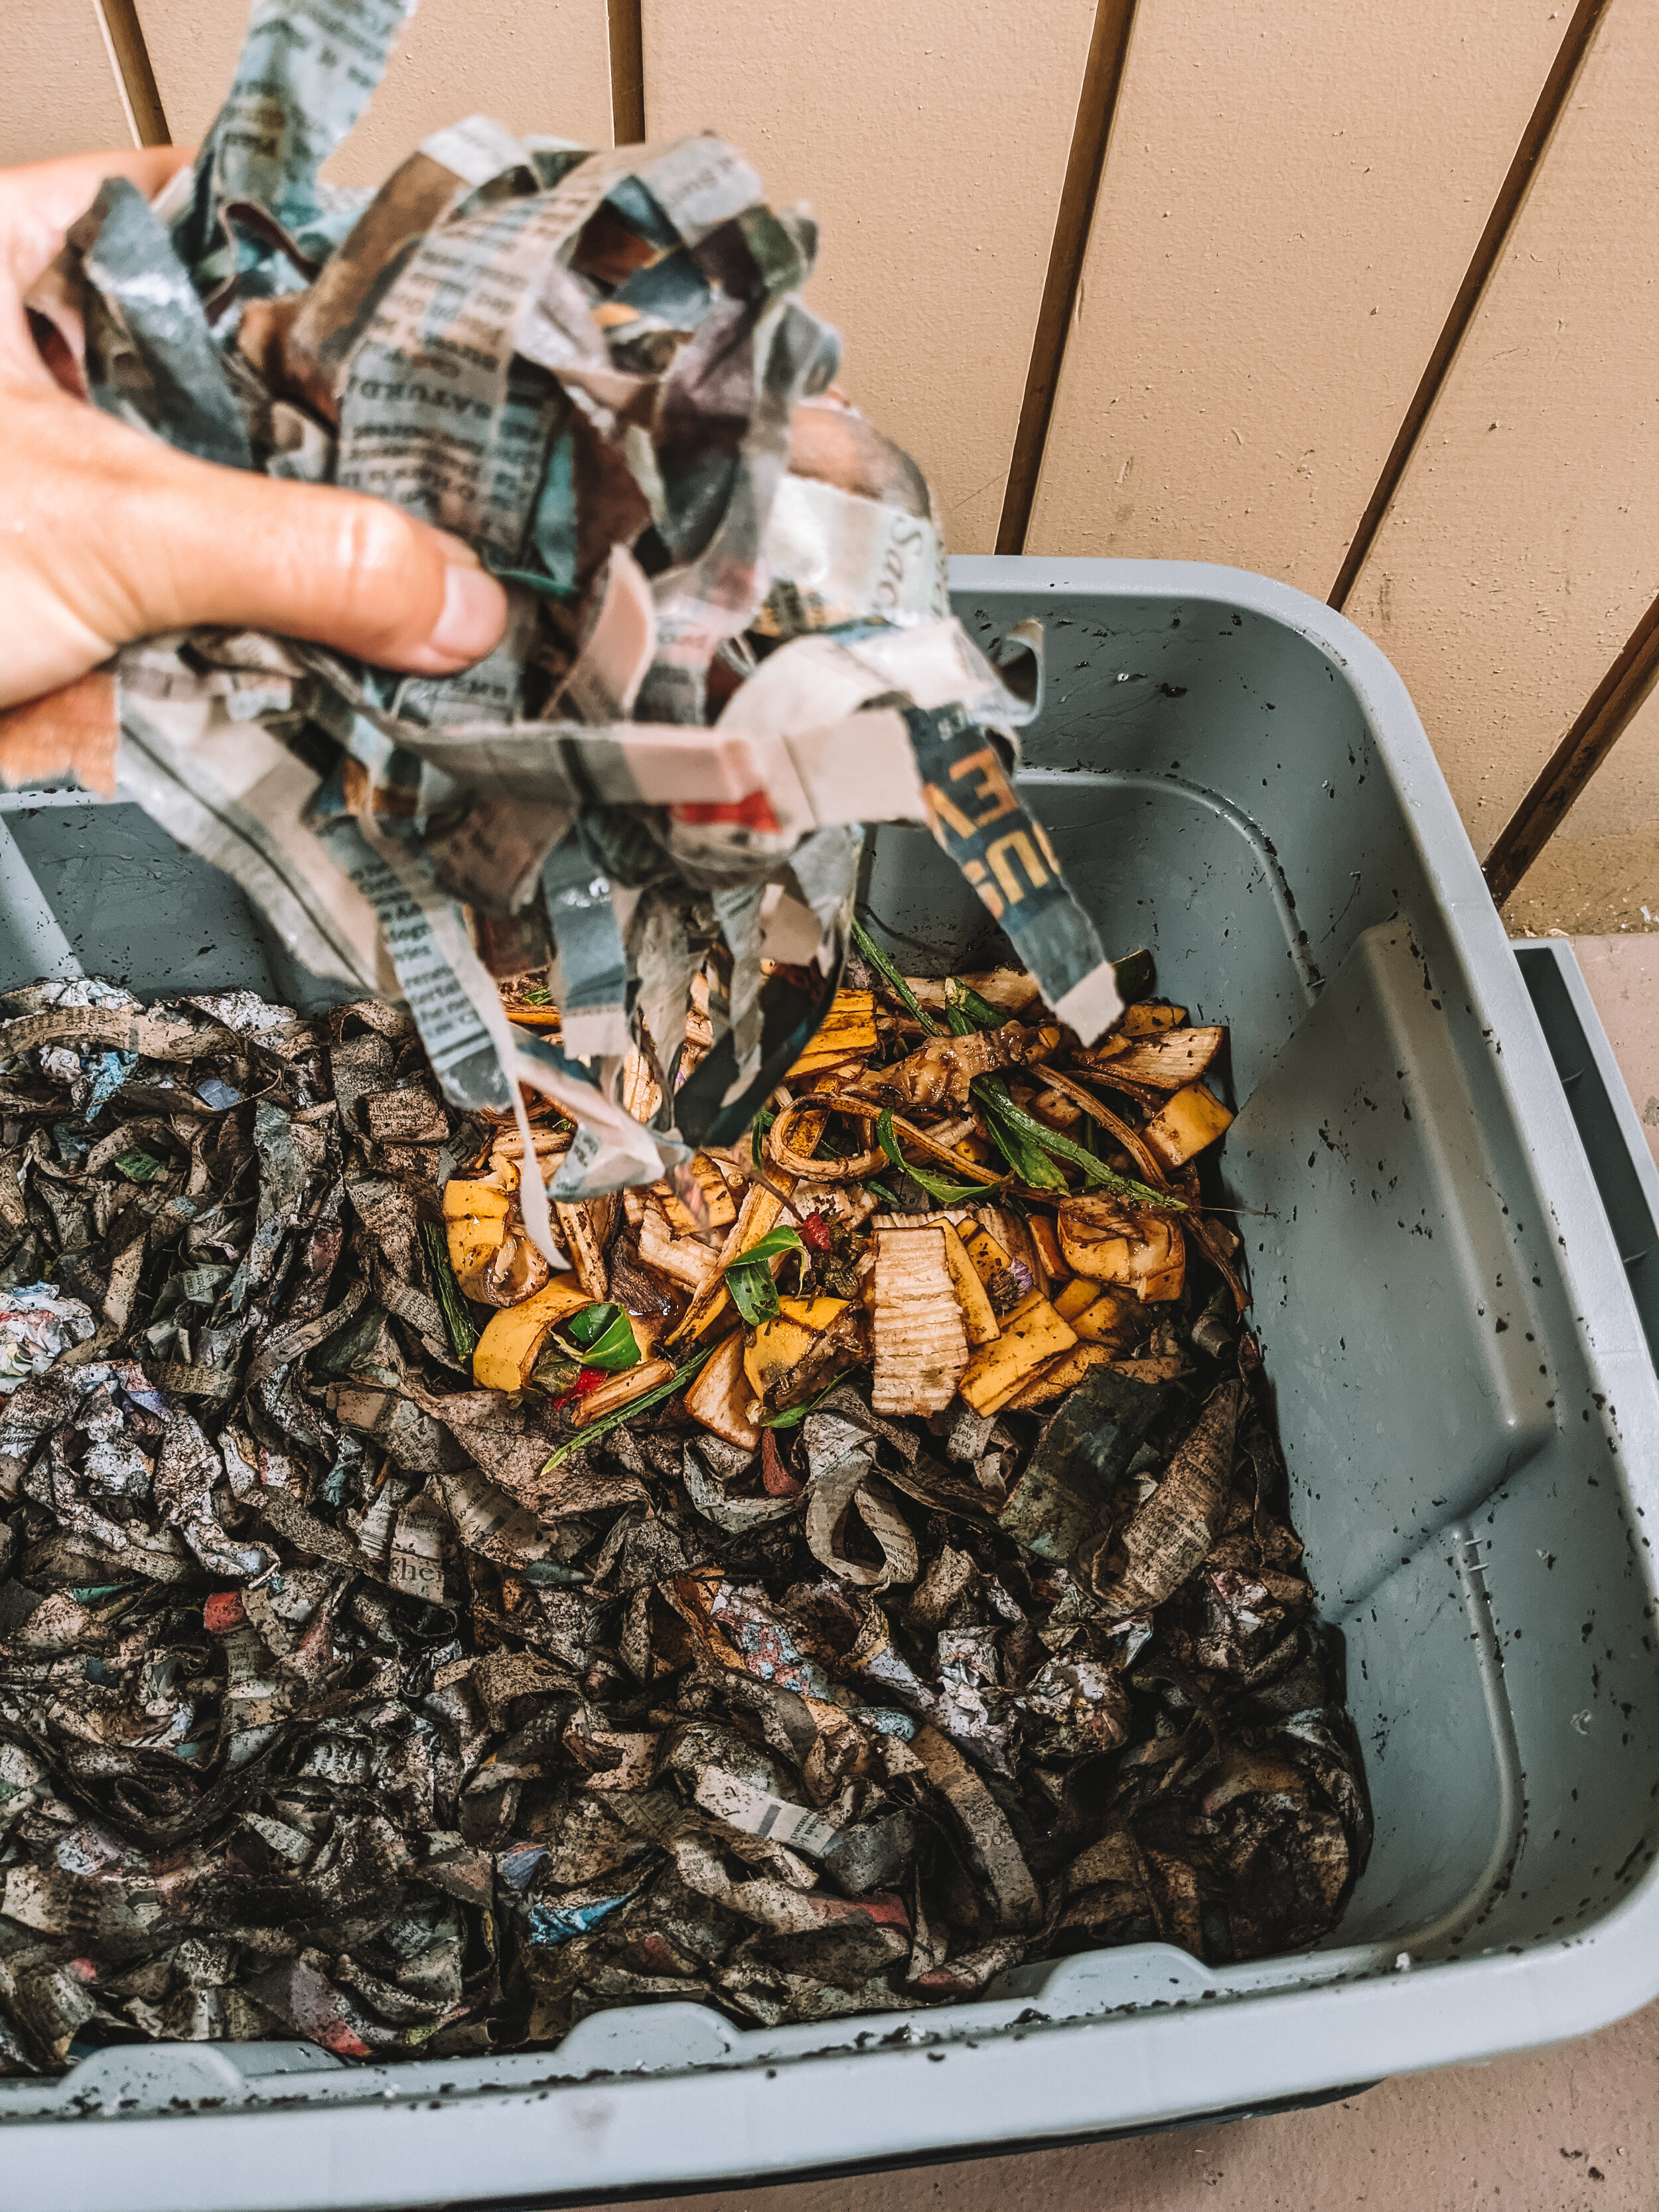
Always bury your scraps and cover with newspaper
TOTAL TIME TO BUILD
1 hour + shopping
TOTAL COST TO BUILD
$63.15
(2) 10-gallon bins . . . $19.20
European red wigglers . . . $18.00
Stainless steel kitchen bin . . . $25.95
WHAT RED WRIGGLERS CAN EAT
Make sure to cut their food into smaller pieces or run it through a food processor. Since worms don’t have teeth, dirt and eggshells add “grit” to help them digest food.
DO FEED: non-acidic fruits and vegetables, cardboard, shredded newspaper, egg cartons, coffee, tea (we’ve heard some teabags contain microplastics so be wary), leaves, dye-free flowers, grass clippings, cleaned and crushed eggshells or crushed Tums if you don’t eat eggs. Pretty much any soft plant material is good game.
FEED IN MODERATION: white paper, and plain pasta, rice, bread, and potatoes.
DO NOT FEED: citrus, meat, dairy, oily or greasy foods, spicy or acidic foods, canned or processed foods, pet waste, glossy paper. Avoid anything too woody or hard.
When in doubt, just remember that worms are VEGAN and they like prep scraps, not plate scrapings.
TROUBLE-SHOOTING
Things are starting to get a little stinky. Most likely you’re overfeeding your worms and food is rotting quicker than they can consume. Check to see if they’ve finished working through most of their food before feeding them again and adjust the amount accordingly. As they start to reproduce, they’ll go through their food more quickly. Things might also be too wet so make sure to thoroughly wring out your bedding before placing inside and consider adding more ventilation holes.
My worms are trying to get out of my bin! If it’s just 1 or 2 worms you’re fine, but if you see the bulk of them trying to flee, there might be a serious problem. There could be a few reasons for this. The contents of the bin should always be damp but not dripping wet. If it’s too dry, they’ll dry out, and if it’s too wet, they’ll drown. They could also be starving, so check to see how quickly they’re finishing their food. If they’re gathering near the top, the bedding might be too dense and you should consider better ventilation. And make sure they’re always at a comfortable 54 to 84 degrees Farenheit. (NOTE: if you notice them gathering in a ball before a storm, this is normal behavior so don’t fret!)
Pesky fruit flies are starting to appear. Make sure you bury your food scraps well, and always cover with newspaper when adding new contents. You can also lay a sheet of cardboard directly over the bedding.
Compost is falling out the bottom holes. To keep things more contained, you can lay some plastic mesh or nylon over the bottom holes. Do not use metal as it will rust.
WHAT TO DO WITH YOUR COMPOST
Are you a plant lover with a billion houseplants? They will LOVE your worm castings. Just sprinkle them on top of or mix into soil and water regularly. If you don’t have any plants, gift it to friends who grow things, befriend some neighbors, or check if there’s a community garden or local farm nearby you can donate to.
Let us know how your compost is doing! Tag us in your posts on Instagram @opuseventsco. Happy composting!
SUPPORT & REFERENCES:
1) The Urban Homestead by Kelly Coyne and Erik Knutzen, pg 51 - 55
2) “Compost Infographic” Institute for Local Self-Reliance
3) “What Can Red Wrigglers Eat” The Squirm Firm
4) “Composting with Worms: Don’t Make These Five Mistakes” Uncle Jim’s Worm Farm
5) “How to Create and Maintain an Indoor Worm Composting Bin” EPA
6) “Worm Composting 101” Planet Natural
7) “Decomposers” National Geographic